It also won't work in your sandbox or talk page.
To test your code, please go to your common.css.
| These snippets are available to wiki admins who want to edit their common.css. They don't work in other wiki contexts, like personal profile pages. | |
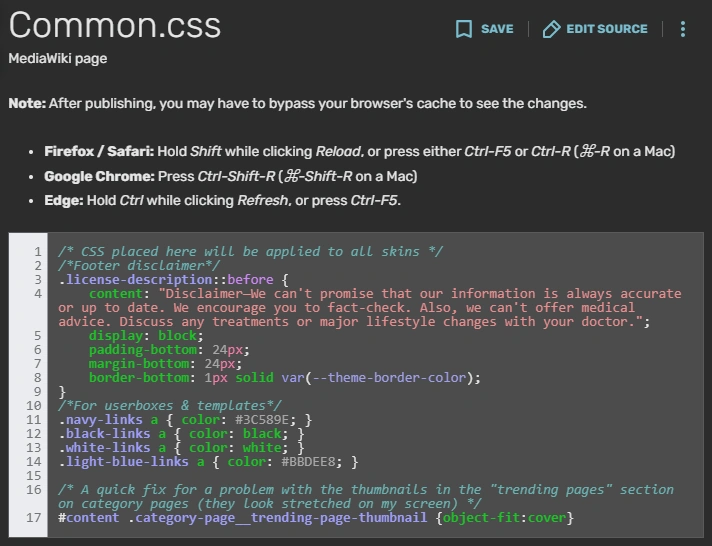
Example CSS from the Autism Living Wiki
Wiki admins can customize a wiki through the MediaWiki:Common.css page on the admin dashboard. With it, you can add certain features to make the wiki experience more enjoyable and personalized.
This page offers a list of free snippets you can add to your MediaWiki:Common.css page.
If you don't have admin rights to a wiki, you can't edit its Common.css. However, you can do these things:
- Ask someone with admin rights to add the code.
- Edit your personal common.css to make changes that show up only for you.
Best practices
Putting the user first
- See also: Accessibility and Usability
Every change should make the user experience better, not worse. As you explore wiki CSS, ask yourself:
- Does this code improve or worsen readability?
- Am I adding visual clutter? How much?
- Do users benefit from this feature, or might it be unimportant to them?
- Does this clash with common accessibility advice?
Wiki CSS is not the place to show off what you can do. (That's what your portfolio or profile page is for.) It's a place to make things better for users. Cluttered, clashing, or inaccessible design aspects will drive away users. Make the wiki easy to look at.
Consider page speed. Some users will have slower internet connections. Don't burden loading times with huge images or thousands of unnecessary lines of code.
Writing and copy-pasting good code
Credit a snippet's creator via comment (unless no creator was specified). Example: /* Gradient background code by JaneDoe */
NEVER import code onto your wiki if you don't know what it does.
Comment and organize your code! You may be returning to edit this 5 years later when you don't remember everything you did. Or you may have new admins editing code you added. Make editing your code something they can do easily and happily. The last thing you want is someone getting confused or saying, "maybe we should just throw out this jumbled mess."
Debugging
As you code, make only one or a few changes before saving and looking at your results. This saves you from a situation like "I made 50 changes and I don't know which one of them broke something!" Baby steps help you spot bugs early on.
Try looking at several pages to see how your code looks on each one. It's possible that your code will affect things you didn't realize. Be thorough, slow, and methodical.
Debugging is a natural part of the process. If something doesn't work as expected:
- Check your colons and semicolons.
- If you copy-pasted it, delete your edited version and copy-paste the original back in. Does it work now?
- Use !important only for debugging. It's best to avoid leaving it in your code.
Try asking one of our admins or mentors for help if needed.
If one of the snippets below has a bug, please tell us! Then we can fix it.
Free snippets
Here are our free snippets. Remember, introduce them carefully, test often, and credit the creator(s) if specified!
Importing Fonts
This is code that you copy and paste onto your wiki CSS that gives you fonts.
@import url('https://fonts.googleapis.com/css?family=FONT+FAMILY+1|FONT+FAMILY+2|');
To use the above code, replace FONT+FAMILY+1 and FONT+FAMILY+2 with Google font names. Replace spaces with + signs and use | to separate fonts. Browse Google Fonts for a wide selection of fonts!
Instead of using the code above, you can also add fonts in Google Fonts and then click on the CSS import codes to copy to clipboard.
Username Colors and Fonts
To change the color of a username, copy and paste this onto your wiki CSS:
/* Custom username styling */
a[href$=":USERNAME"],
a[href$="/USERNAME"] {
color: COLOR !important;
font-weight: FONT-WEIGHT !important;
font-family: FONT-FAMILY !important;
text-shadow: TEXT SHADOW !important;
}
Replace USERNAME with your username and replace other capitalizations with the code for Fonts, Text Shadow, and Bolding. You can also add more attributes or CSS Animations, too!
Custom Lists/Bullets
To make a list on your wiki use certain characters, copy and paste the following code:[1]
/*Custom bulleted list*/
ul {
  list-style: none;
  padding: 0;
  margin: 0;
}

ul li {
  padding-left: 16px;
}

ul li::before {
  content: "CONTENT"; /* Insert bullets*/
  padding-right: 8px;
}
Then replace "CONTENT" with a symbol that fits your wiki's style. Here are some example symbols:
You can add extra lines under padding-right: 8px; if you'd like to edit attributes like color or font size.
Pick a simple symbol, not something distracting or meaningful. For example, a smiley face bullet could become inappropriate if someone writes a list like:
☺ Abuse
☺ Racism
Always think ahead!
Custom Wiki-Wide Cursors
The following code will give you a wiki-wide custom cursor. Simply replace the LINK with the link to the file which you want to be the cursor! The first LINK is for a non-clickable cursor. The second LINK is for a clickable cursor.
/* Custom cursor */
body,
.Message__content,
.wds-dropdown,
.wds-tabs__tab,
.wds-dropdown__toggle,
.client-js{
   cursor: url('LINK'), auto !important;
}
a,
area,
button,
[role="button"],
.ActionItem,
.Message__title,
.oo-ui-labelElement-label,
.sitedir-ltr input,
.rich-text-editor__toolbar__icon-wrapper,
.rich-text-editor__toolbar__icon-controls {
   cursor: url('LINK'), pointer !important;
}
Custom Tabs
The following code will give you wiki-wide, customized tabs. Copy and paste the code into your wiki's CSS.
/* Customizing Tabber */
.tabbertab {
    border-top: _px solid COLOR !important;
    border-bottom: _px solid COLOR !important;
    border-left: _px solid COLOR !important;
    border-right: _px solid COLOR !important;
}

/* add spaces to tabview tabs */
.tabberlive > ul.tabbernav > li {
    margin-right: 2px;
}
    /* not applying on the last tabview tabs */
    .tabberlive > ul.tabbernav > li:last-child {
        margin-right: 0;
    }

.tabbernav {
    background: transparent;
    border-bottom: 0 !important;
    padding: 3px 0 !important;
}

ul.tabbernav li a {
    -moz-border-radius-topleft: _px !important;
    -moz-border-radius-topright: _px !important;
    background: COLOR !important;
    border-top-left-radius: _px !important;
    border-top-right-radius: _px !important;
    border: _px solid black !important;
    color: COLOR !important;
    font-size: _px !important;
    font-weight: normal !important;
    margin-left: 0 !important;
    padding: _px 0.5em !important;
    position: relative;
}

ul.tabbernav li.tabberactive a {
    background-color: #014604 !important;
    border: _px BORDERTYPE COLOR !important;
    color: COLOR !important;
    cursor: default;
    font-size: _px !important;
    font-weight: bold !important;
}

ul.tabbernav li.tabberactive {
    line-height: 0 !important;
}

    ul.tabbernav li.tabberactive:first-child a {
        margin-left: 0 !important;
    }

.tabbertab .ajax-poll {
    border: none !important;
}

.tabberlive .tabbertab h2,
.tabberlive .tabbertab h3 {
    display: block !important;
}
/* End of Customizing Tabber */
Replace all the capitalized words with the attribute name, and replace all the sections that have _px with a number.
Custom Wiki-Wide links
To change the color, text-shadow, etc. of links throughout your wiki, input the following code to your Wiki's CSS:
/*Link color customization. Code credit to Cleverduck09*/
a:link { /*What the link looks like when you haven't clicked/hovered on it*/
  color: CODE;
  background-color: CODE;
  text-decoration: CODE;
  text-shadow:CODE;
}
a:visited { /*What the link looks like when you've visited it*/
  color: CODE;
  background-color: CODE;
  text-decoration: CODE;
  text-shadow:CODE;
}
a:hover { /*What the link looks like when you're hovering on it*/
  color: CODE;
  background-color: CODE;
  text-decoration: CODE;
  text-shadow:CODE;
}
a:active { /*What the link looks like when you click it*/
  color: CODE;
  background-color: CODE;
  text-decoration: CODE;
  text-shadow:CODE;
}
Replace all CODE with the proper formatting for that attribute. Remember to look at the /*notes*/ to see what version of the link text you're editing!
Custom Scrollbar
To get a custom scrollbar on your wiki, put in the following code into the Wiki CSS:
/*Custom scrollbar created by Anonminati, modified by Cleverduck09*/
::-webkit-scrollbar-track {
	-webkit-box-shadow: inset 0 0 6px COLOR;
    background-color: COLOR;
    background-size: cover;
	border-radius: 10px;
}
::-webkit-scrollbar {
	background-color: COLOR;
	width: 15px;
}
::-webkit-scrollbar-thumb {
	background-color: COLOR;
	background:COLOR;
    border-radius: 10px;
    background-size: cover;
}
To use it, replace COLOR with a color of your choice! You can also add more attributes.
Custom Wiki-Wide Headers
To make wiki headers look a certain way all the time, input the following code into the wiki CSS:
/*Wiki headers code with help from Cleverduck09 and the Fandom Developers Wiki*/
.body .WikiaPage .WikiaArticle .mw-content-text {
    ATTRIBUTES;
}

.FANDOM-H2-CC,
.WikiaArticle h2 {
    ATTRIBUTES;
}

.WikiaArticle h3 {
    ATTRIBUTES;
}

.WikiaArticle h2 + h3 {
    margin-bottom: 15px;
}
To use the above code, replace ATTRIBUTES with CSS Attributes!
Page load fade in
When put into your wiki CSS, the below code will create an animated load on your page!
/*Page load fade in, credit to Cleverduck09*/
@keyframes textanimation {
	from{opacity:0;}
	to {opacity:100}
}
body,
.Message__content,
.wds-dropdown,
.wds-tabs__tab,
.wds-dropdown__toggle,
.client-js{
	animation-name:textanimation;
	animation-duration:1s;
	animation-iteration-count:1;
	animation-delay:0s;
}
See also
- Accessibility
- Comments
- Customizing your wiki
- Usability
- User experience
External links
- Fandom Developers Wiki
- Help:Community CSS and JS at Community Central
- Help:Web accessibility at Community Central
- Help:Web accessibility/checklist at Community Central
References
- ↑ CSS list-style-type Property, w3schools