See Also:
Introduction
Have you ever wondered how to get an image to go in an article/template? How do you get that little border on an image? Look no further, this is the place for you! Images are incredibly useful to help your readers understand content, and this article is teaching you all about image modification!
This guide covers how to add borders, alignment, alt text, size, and more! First, let's take a look at how you can insert an image.
Note: If you are adding any of the attributes like alt text or borders below, add them in the order they are listed, otherwise it will not work.
Many of the same principles apply to uploading gifs, but the suffix is different. The suffix for a gif is '.GIF'.
Uploading/Inserting Images
Uploading Your Own Images
To upload an image, click on the upload button. The upload button looks like the following:

After that, a menu should pop up giving you the option to select a file or drag one. Follow the instructions and choose a method! When you drag a file in, click on 'Upload All'. When it finishes uploading, click 'Insert all'. You can insert multiple images at a time this way. Click the blue button in the corner to advance when selecting files!
Using Pre-uploaded Images
Click on the 'Insert Image' icon, which looks as follows:

Then, in the search box, type in a keyword or two for the image you are looking for. Some Wikis have more photos pre-uploaded than others, so you might not find what you are looking for. In that case, go to the "Uploading Your Own Images" section.
Inserting Images
If you forget to actually insert the image, that's OK! You can do this by typing in:
[[File:IMAGENAME.PNG|thumb]]
Most times, when you upload or try to insert a pre-uploaded image, it will automatically insert. However, sometimes this feature glitches. This section is here to help you when that happens!
Note: Sometimes, 'PNG' needs to be uncapitalized!
Alt Text
Alt Text is something that shows up in place of the image if the image cannot appear or the viewer is using a screen reader.
Once you have inserted your image, it should appear like this:
[[File:IMAGENAME.PNG]].
After the 'thumb', type in the following to get alt text:
|alt=ALT TEXT
It should look like this:
[[File:FILENAME.PNG|thumb|alt=This is an example of alt text.]]
Because Alt Text does not appear unless you have a screen reader on or there is an error, many looking at this will just see the following example as a picture. But if you have a screen reader on (or there is a glitch), you will be able to see the Alt Text for this!
Example:
Link(s)
Links are very helpful in general, and in images, you can make them look really nice! After the 'thumb' of your inserted image, type in the following to get a link:
|link=https://YOURLINK
It should look like this:
[[File:FILNAME.PNG|thumb|link=https://YOURLINK]]
Example(link to homepage):

The code for this:
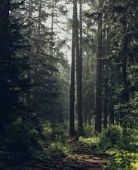
[[File:Forest1.PNG|thumb|link=https://coding-help.fandom.com/wiki/Coding_Help_Wiki]]
Border
Borders are exactly as they sound! This wiki code places a small gray border around the photo's edge.
After the 'thumb' of your inserted image, type in the following to get a border:
|border
It should look like this:
[[File:FILENAME.PNG|thumb|border]]
Example:
Sometimes the border is incredibly hard to see on Wiki page backgrounds; a black background was added to the photo using div style (CSS) to make the border more visible.
The cheat way to make a border is to use this code:
<div style="box-sizing:border-box; border:TYPE; width:auto; height:auto">[[File:FILENAME.EXT]]</div>
Replace TYPE with the code for a Border (solid, dashed, dotted, double). Then, replace FILENAME.EXT with the name of your file and its extension (PNG, JPG, GIF - use uppercase or lowercase as in the original filename & extension)! This results in something like:
<div style="box-sizing:border-box; border:5px dotted green; width:auto; height:auto; float:left">[[File:Forest1.PNG]]</div>
How it shows up:
Alignment
Alignment is which part of the page the image is on; left, center, or right.
After the 'thumb' of your inserted image, type in the following to get center image alignment:
|center
To get Left image alignment:
|left
To get right image alignment:
|right
It should look like this:
[[File:FILENAME.PNG|thumb|*alignment*]]
Example:
This image is right-aligned -->
You can also change the alignment by using a table and choosing which of the columns/how far to the left/right the image will be. Things like borders, backgrounds, and captions can be added in the regular format here. For more info on how tables work, visit Tables.
Example:
|
|
|
|
|
The code for this:
{|
|[[File:Forest1.PNG]]
|[[File:Forest1.PNG]]
|[[File:Forest1.PNG]]
|[[File:Forest1.PNG]]
|}
More Alignments
|top
and
|bottom
The top will make your image higher. Example
Code:
[[File:Forest1.PNG|top|center|See how the image is higher?]]
The bottom is coded the same, however, you'll change 'top' to 'bottom' will make the image go more at the bottom Example:
This will be helpful especially when using borders!
Size
Image size can be done in two ways. The first way's code looks like:
[[File:FILENAME.PNG|thumb|__px]]
Replace the blank with a number to make the image larger or smaller (depending on the default size). The first way is more recommended, as it is easier.
Example:
The second way:
[[File:FILENAME.PNG|thumb|__x__px]]
The second way of doing this is more complicated, it involves 2 numbers instead of 1 and can't be guessed.
To get your measurements:
- Hit the 'Insert Image' button
- Type in the name of your file
- Click on your file
- Click 'Use this image'
- Click 'Advanced'
- Copy and paste the measurements
Example:
Caption
Captions are incredibly useful to describe a complicated image. WikiText can be used in captions
The following code can be used to do this:
[[File:FILENAME.PNG|CAPTION]]
Example:
CAPTION
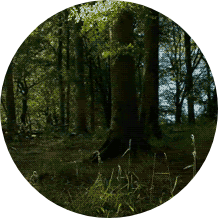
Cropping Images
There are two ways to crop images. The first way is to go to an online image cropper like below:
To use these, visit the links, upload your image, and then crop it how you want. After, download it again, and upload it on the Wiki, like explained at the beginning of this tutorial.
Example of a circle-cropped photo:
.png)
The other way to do this is to create a container that the image will overflow from. Use the following code to do this:
<div style="height: NUMBER; width: NUMBER; overflow: hidden">IMAGE</div>
This results in:
You can also use borders to make the image round. Just set the border-radius to 50%.
Like this:
<div style="border:2px solid black; border-radius:50%; overflow:hidden; width:100px; height:100px;">[[File:Forest1.PNG]]</div>
Make sure to set the width and height to the same pixel value!
Examples
An image with a caption and a border (although the border is almost invisible):
CAPTION
The code for this:
[[File:Forest1.PNG|thumb|center|border|CAPTION]]
A GIF with a caption and a border (although the border is almost invisible):
CAPTION
The code for this:
[[File:Forest3.gif|thumb|center|border|CAPTION]]
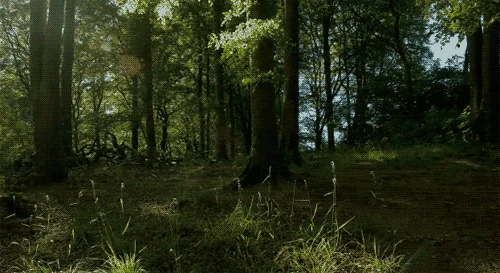
A GIF with a caption:
CAPTION
The code for this:
[[File:Forest.gif|thumb|This is a gif of a forest!]]
Note how the suffix (GIF/gif) is different than that of an image (PNG/png)!
GIFs and images with styled borders:
The code for this:
<div style="border: 2px inset gray; width: 138px">[[File:Forest1.PNG]]</div><hr>
The code for this:
<div style="border: 2px dashed purple; width: 500px">[[File:Forest3.gif]]</div>
The code for this:
<div style="border: 8px double aqua; width: 500px">[[File:Forest3.gif]]</div>
The code for this:
<div style="border: 2px inset gray; width: 500px">[[File:Forest3.gif]]</div><hr>
Linked gif:

The code for this:
[[File:Forest3.gif|link=https://coding-help.fandom.com/wiki/Coding_Help_Wiki]]
Cropped image with a border:
The code for this:
<div style="height: 100px; width: 100px; border: 5px double green; overflow: hidden">[[File:Forest1.PNG]]</div>
Galleries, Slideshows, and Sliders
Galleries
Galleries are collections of thumbnails (auto-sizes of an image) organized like tiles. Below is an example:
")
")
")
The code for this:
<gallery widths="185">
Example.jpg
Forest1.PNG|Captions still work here!
445411.jpg
</gallery>
First, type in the gallery tag. Then, take out the [[ and ]] surrounding the image as well as the 'File:' Place separate images a line below each other!
Slideshows
A slideshow is an image-displayer that displays one image at a time, and when the next button is pressed, will rotate through other images. Videos cannot be placed on a slideshow. Below is an example.
The code for this:
<gallery type="slideshow">
Example.jpg
Forest1.PNG|Captions work here, too!
</gallery>
The code for slideshows is very similar to that of galleries. Do the same thing as above, but add in type="slideshow" after the gallery tag.
Sliders
Sliders are image displayers that display one image at a time and will automatically rotate through up to four images! Videos are ignored if placed on a slider. Below is an example:


The code for this:
<gallery type="slider">
Example.jpg
Forest1.PNG|Captions still work here!
</gallery>
Do the same thing you did for the slideshow, but replace 'type="slideshow"' with type="slider".