Badges are coded items made of HTML and WikiText that are commonly used on profile pages. They tell readers that the user is friends with someone, a club they are in, or that the page contains spoilers from the latest book! Badges are made from things called templates, which hold the code of the badge. Templates are not the same as articles and must be used to make a badge.
This tutorial will teach you how to create and use badges.
Note: Badges are made by coding. If you do not know how to code, please request for someone to make the badge for you, or take a look at the beginner's guide and this blog post.
Making Badges/Templates
Example of a friend badge:
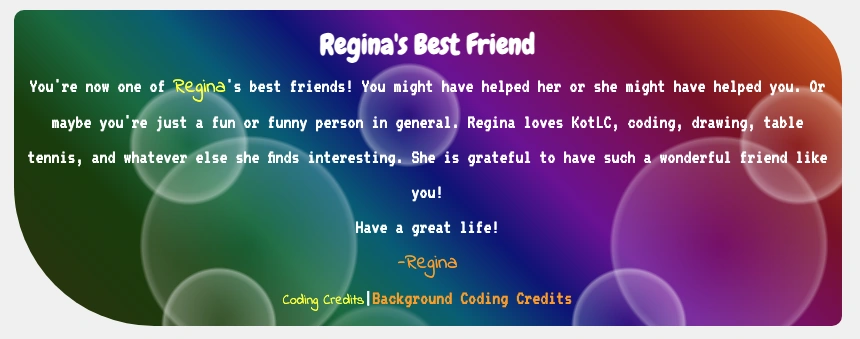
While friendship badges are common, you can make badges for anything you'd like.
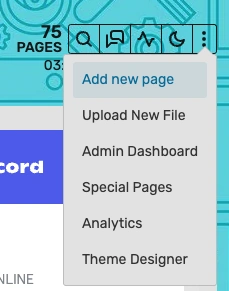
Step One: Create Page
Click the "Add new page" button. This should be in the upper right-hand corner of the wiki setup:
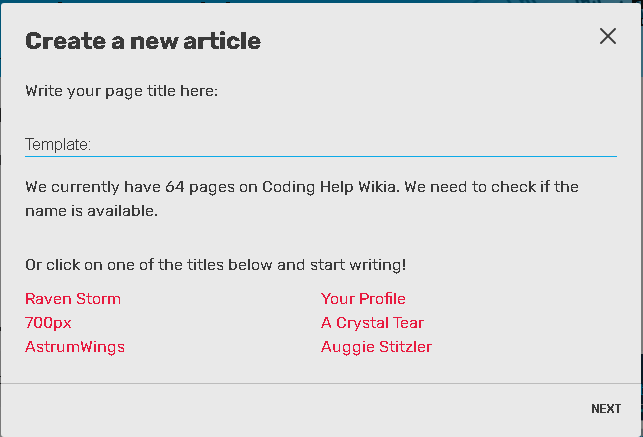
Step Two: Make Template
Name the page. When prompted, name the page:
Template:
After 'Template:', write the name of the badge. Don't put a space after the colon. For example, Template:Luna's Friend
The "Template:" prefix is important. It tells Fandom that this new page is in the "template" namespace. This means that template features will work. If you don't do this, your badge won't display properly. (Moving a page can change its namespace. If you mess up, try moving it.)
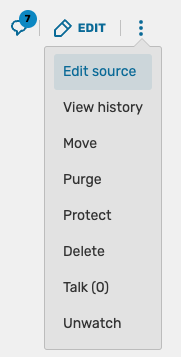
Step Three: Edit Source
Click the 'Edit source' button!
Edit the template. Go to the top right and find the "Edit source" button. (Or, if you end up in the visual editor, switch to source editing.)
Step Four: Adding Code
Now it's time to start writing code. Start out by wrapping your code in div tags. Always type the closing tag before you start adding details.
<div>
Badge text here. You can add as much text as you want.
</div>
Now it's time to add inline CSS. For example, perhaps you want to start with a background color and text color:
<div style="background: LightCyan; color: black;">
Badge text here. You can add as much text as you want.
</div>
Padding is important for readability. Between 10px and 20px is usually good.
<div style="background: LightCyan; color: black; padding: 10px;">
Badge text here. You can add as much text as you want.
</div>
You can continue to customize. You might like to explore borders, border radius, font, gradients, and more. Keep accessibility in mind: your design should be pleasant and readable for all users.
Step five: Categorizing
After your closing div, write the following code:
<noinclude>[[Category:Badge templates]]</noinclude>
Or, if it's a friendship template, try:
<noinclude>[[Category:Friendship badges]]</noinclude>
The "noinclude" tags are special WikiText tags. This means that anything you put between them will be seen when you visit the template page, but it won't show up when people actually use the template. So you can put categories and/or information (like instructions) in here.
The badge templates category will place your badge in Category:Badge templates. The friendship badges template is for Category:Friendship badges. A good category will help you find it later. It also means that it's easier for other people to find and appreciate your badge!
Step six: Parameters (optional)
- Main article: Template parameters
Parameters are optional for badge templates. But if you're comfortable with templates, you can try adding this feature. Parameters make your templates customizable. Then, each time you use the template, you can make it a little different.
For example, the kindness badge has parameters. This means we can make different versions easily, like:
For example, let's say we want a parameter that lets us use a different emoji each time. We'll name it "emoji." It would look like: {{{emoji|}}}. Then we put it in the spot where we want our emojis to go. For example:
<div>{{{emoji|}}} Kind person {{{emoji|}}}</div>
When the template gets used, users have the freedom to choose a different emoji every time. Fun, right?
Template parameters can also be used in the CSS. For example, maybe you want users to be able to control the border color. You can add a parameter and name it "border." You can also give it a default value in case the user doesn't enter a border color. It would look like this:
<div style="border: 2px solid {{{border|purple}}};">(Text goes in here.)</div>
We put "purple" in between the | symbol and the }}}. This means that the default value is purple. The user can choose a color, and if they leave it blank, the color will be purple.
Parameters can be hard to understand at first. Here are some tips:
- Look at some templates that use parameters successfully, like Template:Kindness badge
- Try putting an example use of your template inside the noinclude tags. This can make testing and debugging easier.
- Be patient with yourself! It gets easier with practice.
Once you're good at parameters, it can give you a lot of freedom when you're making templates. Make sure to add template data to help users navigate your parameters.
Using a Template/Badge
First, go to the page where you want to add the template.
- Source editor: Type in {{NAMEOFBADGE}} and the badge will appear. Make sure you spell it correctly.
- Visual editor: Go to Insert > Template. Start typing the name of the template. Then pick it from the list.
If you put in parameters, you can enter values for them. In the visual editor, you do it through the dialog box. In source mode, you do it like this:
{{Kindness badge|emoji=💮}}
If you just want to tell someone the code for a badge and don't want the badge to actually appear, type in <nowiki> tags around the {{NAMEOFBADGE}}. Remember to put in a closing nowiki tag: </nowiki>
Examples
- {{CloseOffYourCoding}} reminds fellow coders to close their tags.
- {{Kindness badge}} is the badge we used as an example. It includes parameters.
- {{Safe space}} tells users they will be accepted for who they are.